While learning WordPress plugin development, you come across the shortcodes API. As a beginner, this is something which I also found quite interesting. It allows me to create small yet nifty plugins quickly.
In this post, I will be explaining what are WordPress shortcodes and how you can utilize the shortcodes API in plugin development.

Shortcodes
Shortcodes are used to insert dynamic content into WordPress posts and pages. Shortcodes are enclosed in the square brackets [ ]. Based upon the text inside the brackets, it is replaced by the content generated by a PHP function, defined at the back-end.
Shortcodes are pretty simple to create and use. Let’s create a shortcode that will display the WPCouple logo. Let’s name it wpc-logo and its shortcode would look like this:
It’s the simplest sort of the shortcode that you’ll ever encounter, i.e. shortcode name in the square brackets.
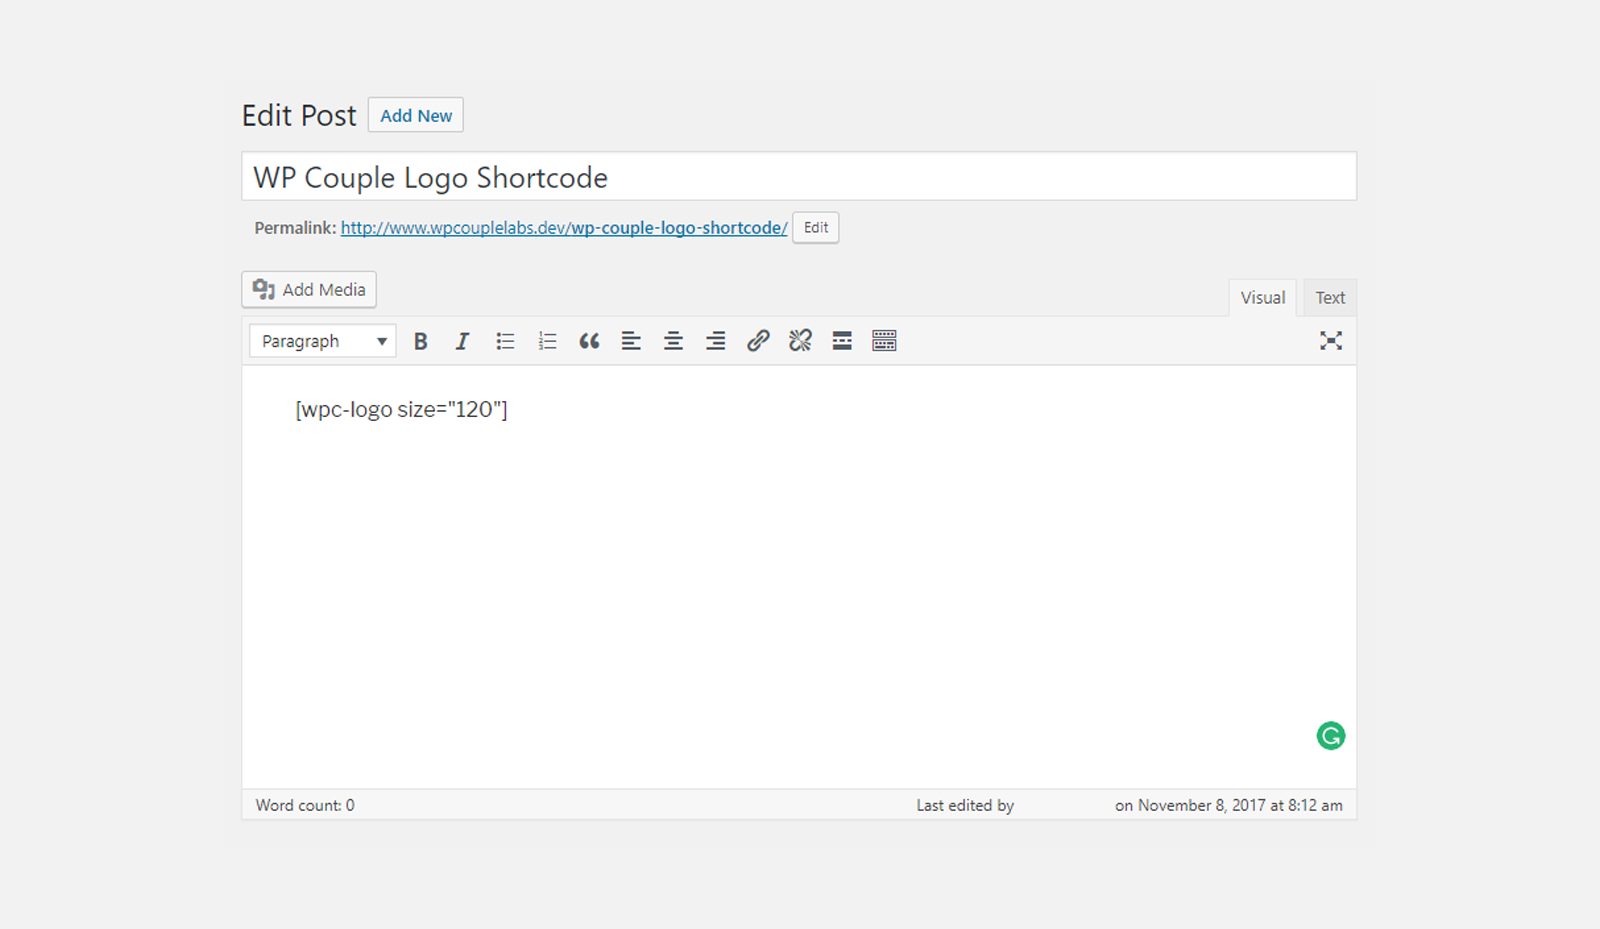
There are advanced forms of shortcodes as well, where you can specify the parameters and even add some content. A self-closing shortcode with parameters might look like this:
Where 120 specifies the width of the logo in pixels.
You can go ahead and even add some text preceding the logo:
Creating a Shortcode
To create a shortcode, you need to do the following three things:
- Write a PHP function that will be invoked when the shortcode is called.
- Add the shortcode to WordPress using a unique identifier.
- Hook the function into WordPress.
Simple Shortcodes
In this part, you’ll learn about creating a simple shortcode like [wpc-logo] using a WordPress plugin.
Let’s say the main file of the plugin is named as wpc-logo.php Now, follow the steps to create the shortcode.
Writing A PHP Function
In your main PHP file, define a function which returns the WPCouple logo.
Adding Shortcode to WordPress
Once you’re done writing the PHP function, next step is to register the shortcode with WordPress. For this, you write a simple register function:
The first argument of the add_shortcode function is the name of the shortcode. The second argument is the name of the function to be called when the shortcode is used.
Technically, you can say when this function is called; it adds the shortcode wpc-logo to WordPress. And whenever the shortcode wpc-logo is used, it will call the function wpc_get_logo().
Hooking Function with WordPress
The next step is to hook the function to WordPress. It will register the shortcode every time you load your WordPress site. You’ll be using init action to hook the registration function.
Shortcode In Action
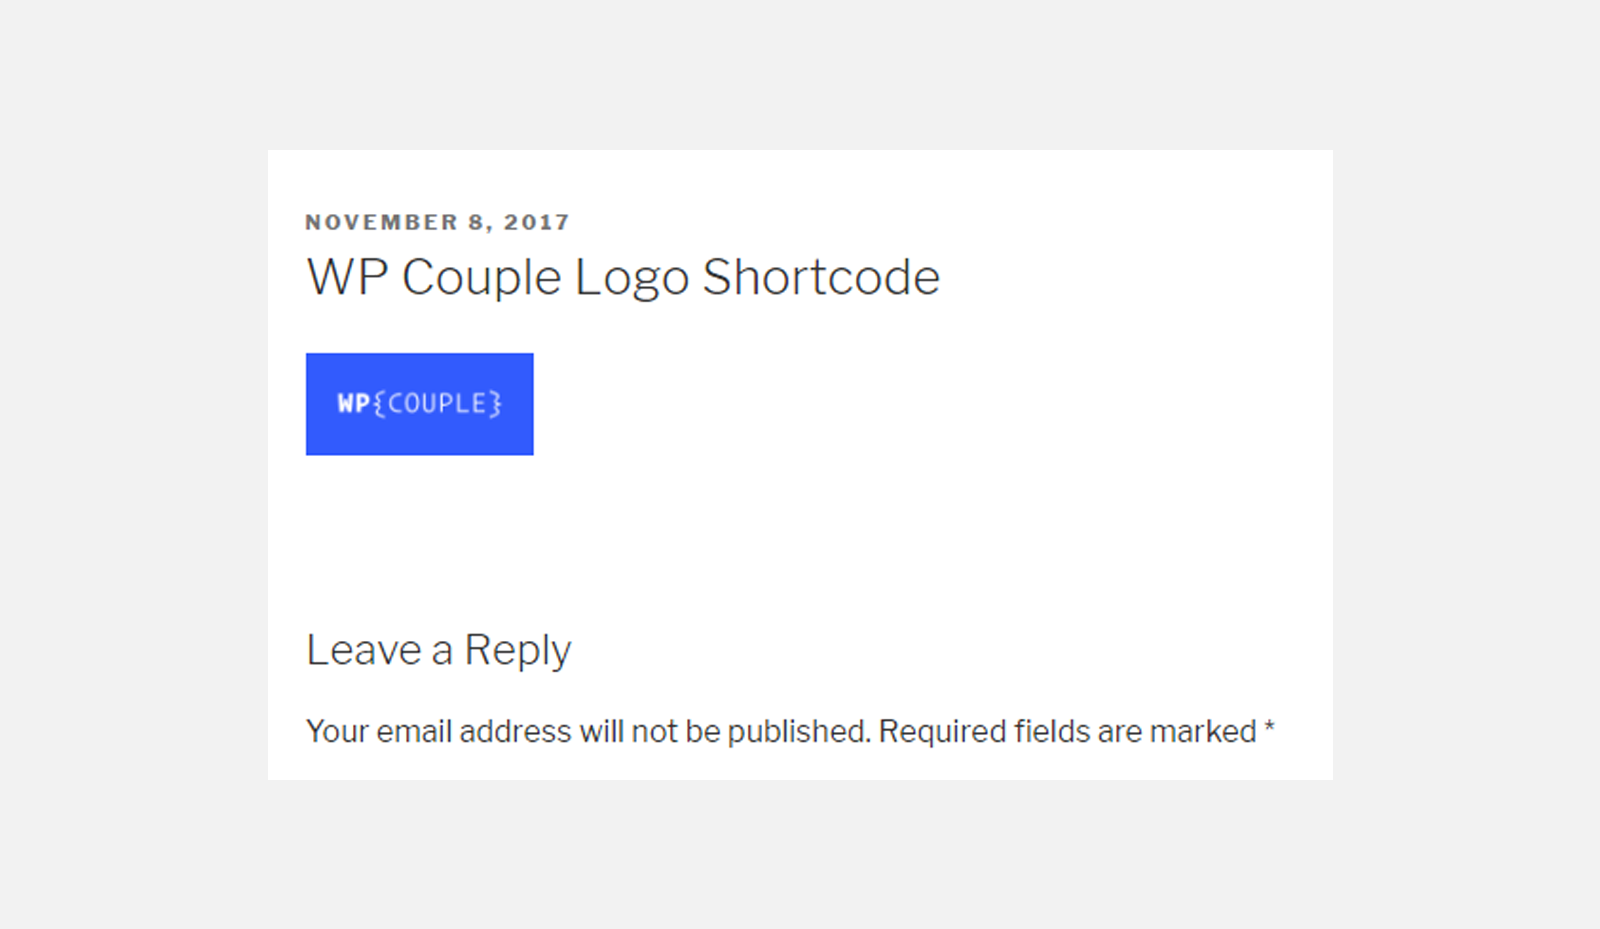
Install and activate the plugin. Create a new post or page and insert the shortcode: [wpc-logo]
Publish the post and check out the post.
![]()
It will look like this:
Shortcodes With Parameters
So far, you’ve learned about how to create simple shortcodes without any parameters. Now, I’ll move on to creating the shortcodes with parameters and enclosing shortcodes.
In this section you will know how to create shortcodes with a structure like this: [wpc-logo size="120"]
Where 120 is the size of the logo in pixels.
Writing A PHP Function
For this type of shortcode, I’ll add a parameter $atts in the function. Inside the function declaration, I used shortcode_atts() function to extract and manage the arguments. Now my wpc_get_logo function looks like this:
The function shortcode_atts extracts the values of the parameters and assigns it to $arguments array. Where ‘size’ => null assigns a null value to the size. Then I checked if the value is not null, then add it to the width of the logo and return it.
The remaining two functions — i.e., adding shortcode, and hooking the function — remains the same.
Shortcode In Action
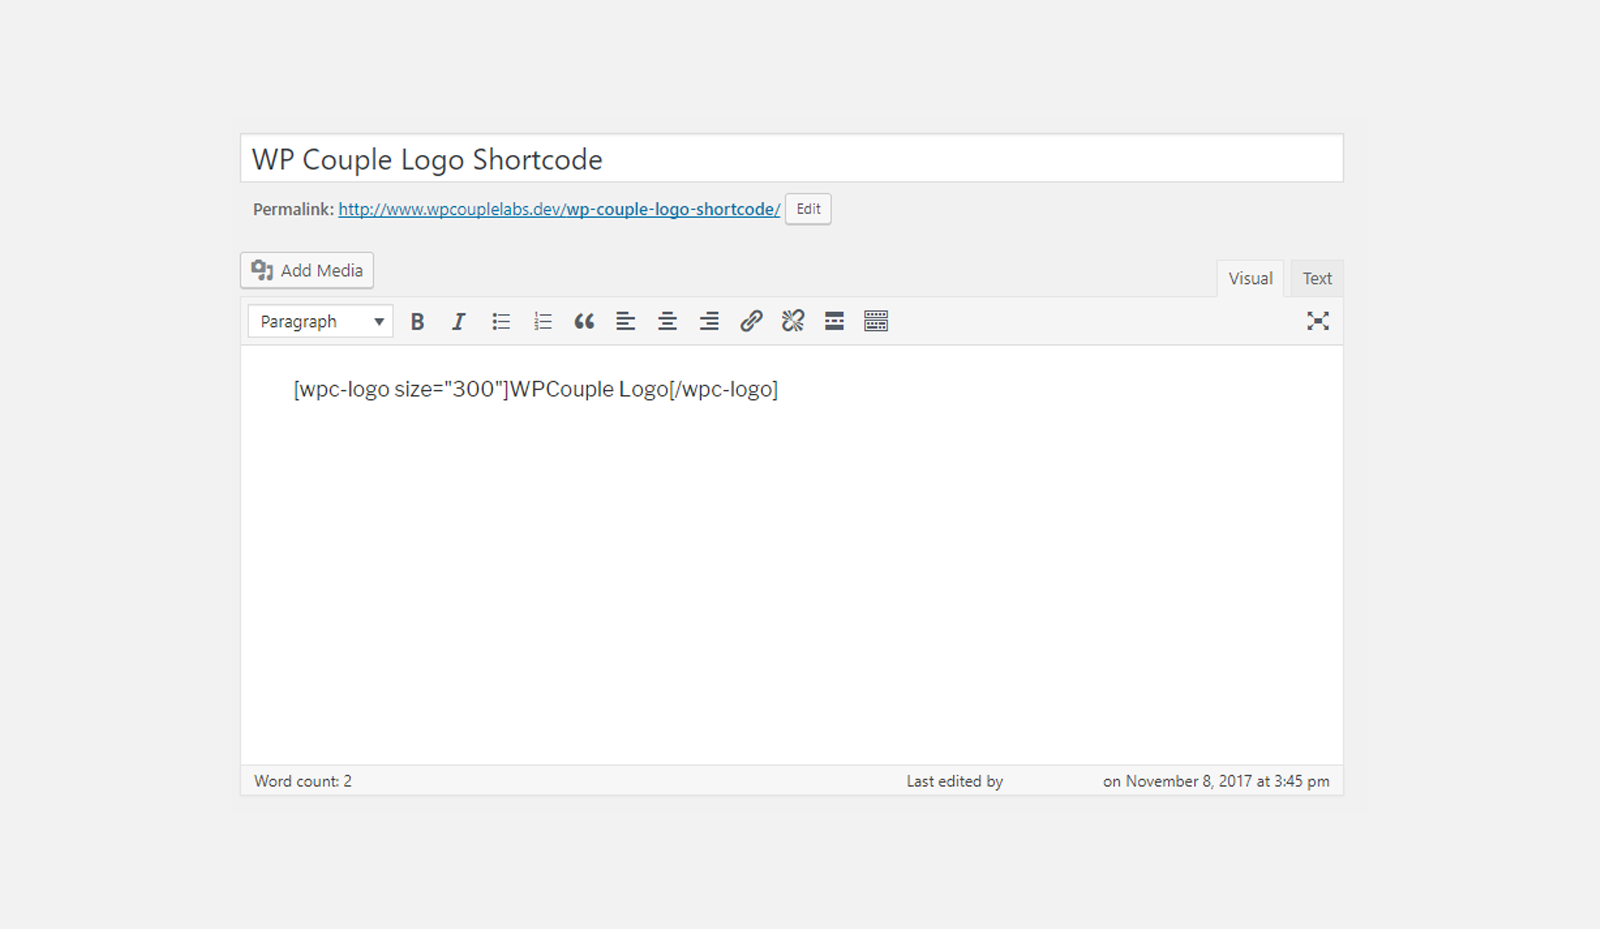
Save the changes in the .php file of your plugin and create a new post with the argument, let’s say size="120". Publish the post and view it.
It will look like this:
Shortcodes With Content
Now, let’s jump to creating shortcodes with content (a.k.a enclosing shortcodes). Here, I’ll create a shortcode which will look like this:
Writing a PHP Function
Once again, the only thing which is different in this type of shortcode is the PHP function. This time it gets another attribute i.e. $content. This variable contains the content enclosed between the opening and closing tags of the shortcode. Now, our PHP function looks like this:
Here, I am only appending the content in H2 tags. It will display the content of the shortcodes as a heading for your logo.
Shortcode In Action
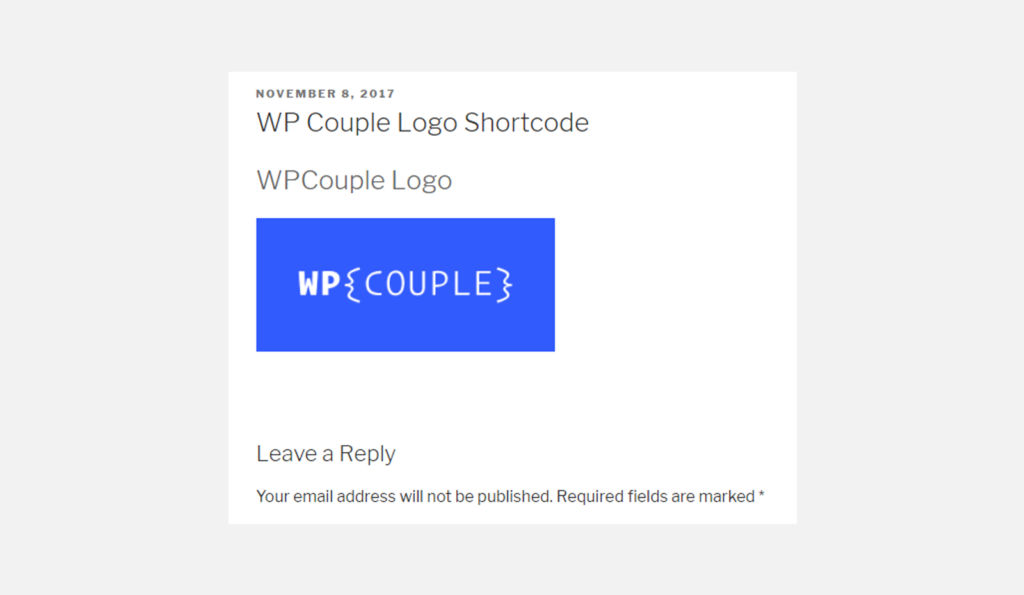
Save the changes in the .php file of your plugin and create a new post with the argument, let’s say size="300", this time. Publish the post and view it.
It will look like this:
What You’ve Learned So Far?
I’m sure by now you’ll be well-familiar to the different types of the shortcodes and how to create them on your own. I tried to keep it as simple as possible. If you face any problem while following the guides, let me know in the comments.
TheDevCouple

AHMAD AWAIS
Developer edutainer: NodeCLI.com · VSCode.pro
Ahmad Awais is an award-winning open-source engineer, Head of Developer Relations at RapidAPI, Google Developers Expert Dev Advocate, Node.js Community Committee Outreach Lead, WordPress Core Dev, and ex VP of Engineering at WGA. He has authored various open-source software tools used by millions of developers worldwide, like his Shades of Purple code-theme or projects like the corona-cli.
Say Hi to him on Twitter — @MrAhmadAwais.

MAEDAH BATOOL
Developer Content Manager: Writy.io
Maedah Batool is an official WordPress Marketing Team Representative, a WordPress Core Contributor, Technical Content Manager and Director of Developer Content at WGA. She created a tech-training startup called FinkTanks where she has taught 7,500+ girls how to code with WordPress, Next.js, React, and more. After FinkTanks was acquired she took a role in DevRel as a Technical Content Manager.
Say Hi to her on Twitter — @MaedahBatool.
🙌
SUBSCRIBE TO DEVELOPERS TAKEAWAY!
A Premium Development Newsletter by TheDevCouple! What is TheDevTakeaway?

Meet Ameer Dagha the man behind ReviewsPK
Read Article
Platform Improvements by Kinsta Hosting That You Should Not Miss
Read Article