In Windows 10’s anniversary update Microsoft introduced bash. It’s not just Bash; rather it’s a windows subsystem for Linux, which adds a layer for running all Linux applications on the windows. You can do scripting, automate your task, streamline your workflow, and what not.
This article primarily focuses the beginners who are figuring out how to install and customize bash on windows.

☑️ Prerequisites
To get started, make sure you have the 64-bit version of Windows 10 with anniversary update installed.
⚡ Installation of Bash
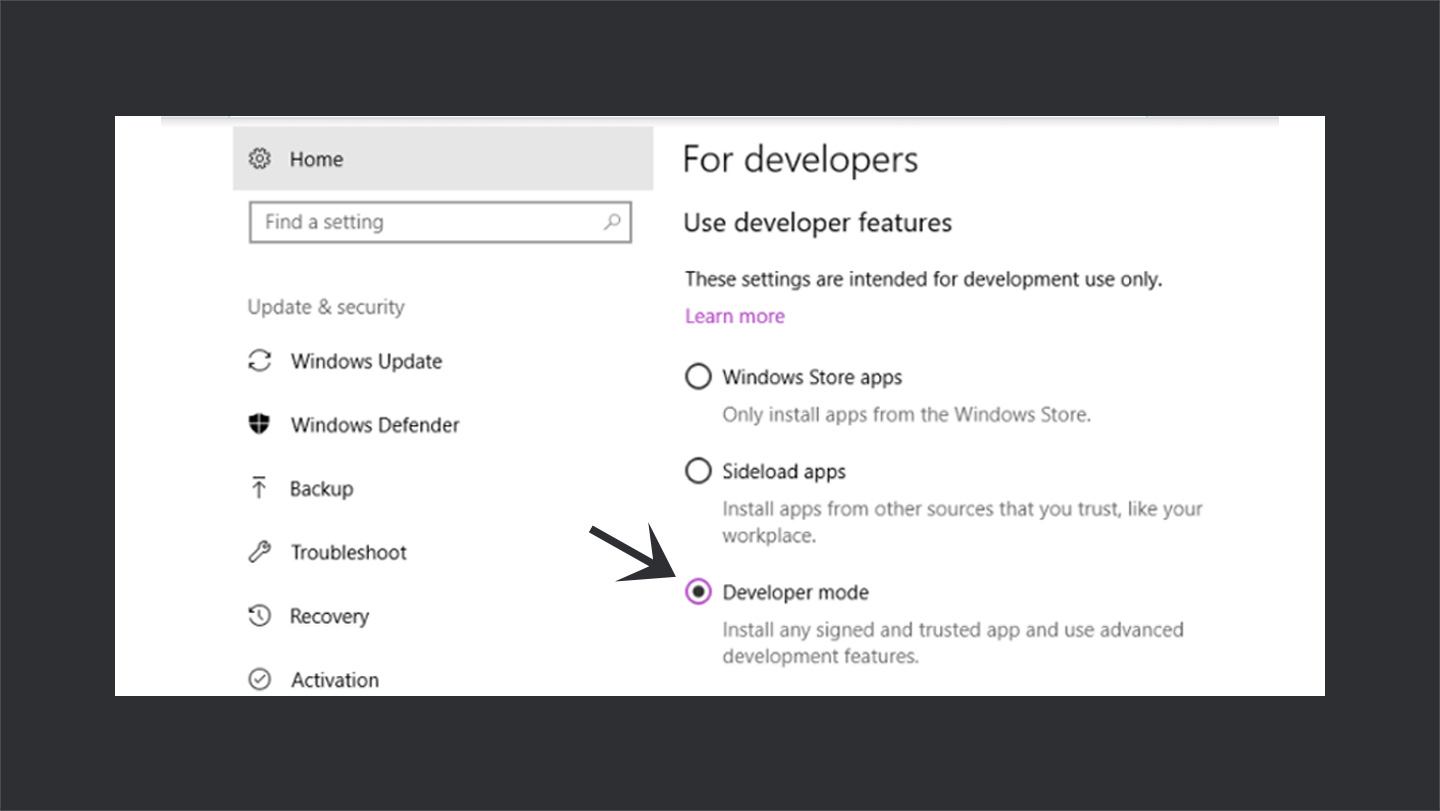
→ Step #1: Enable The Developer Mode
Go to Start > Settings. From here, navigate to Update & Security options. Select For developers option from the left sidebar, and choose the Developer mode. It will prompt a confirmation message. Confirm it, and the developer’s mode will be enabled.

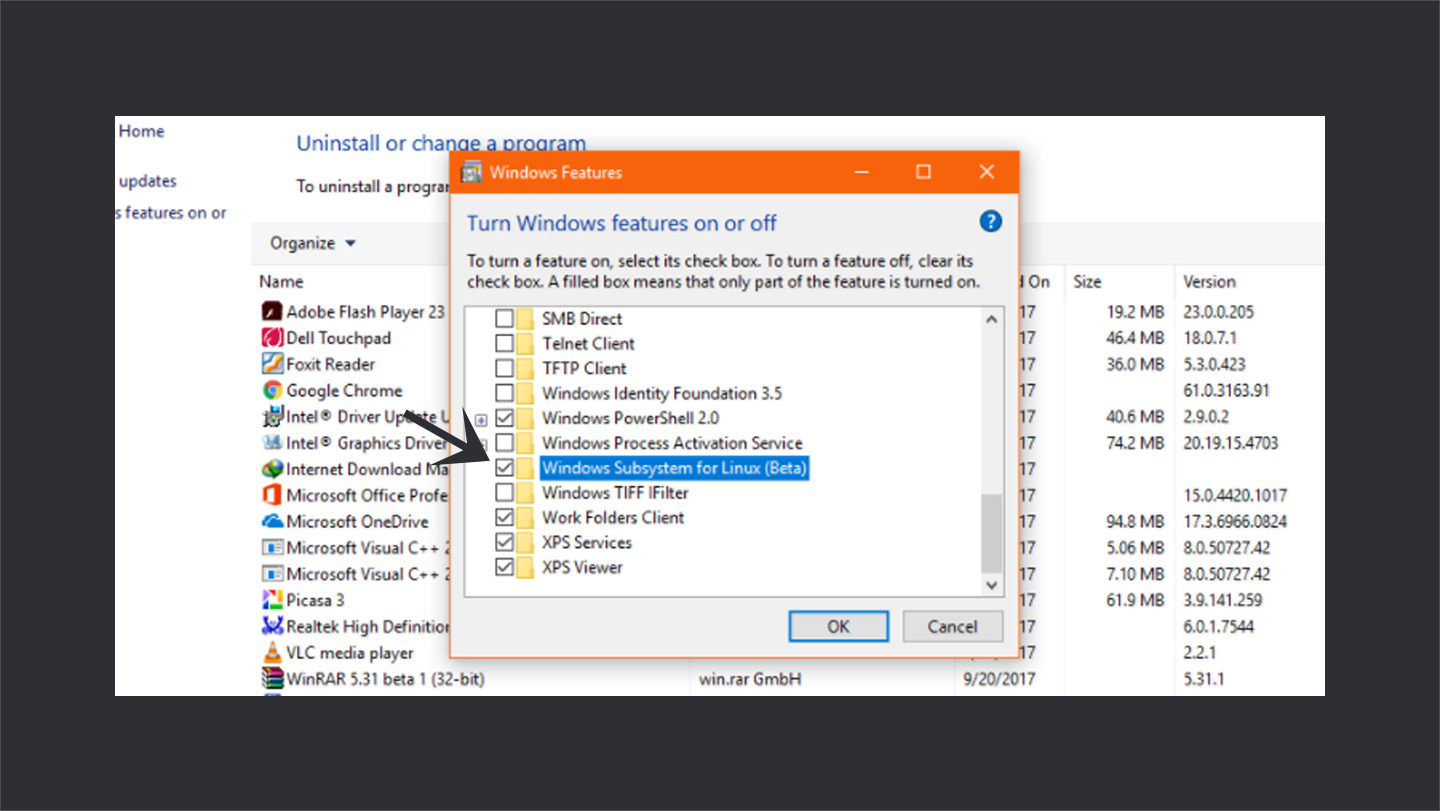
→ Step #2: Install Windows Subsystem for Linux
Go to Control Panel > Programs > Programs and Features. Click on Turn feature on or off. A dialog box will pop up. Scroll down, and check Windows Subsystem for Linux (Beta), and click OK. It will install the required files. Once you are done, restart the computer.

→ Step #3: Install Ubuntu System Files
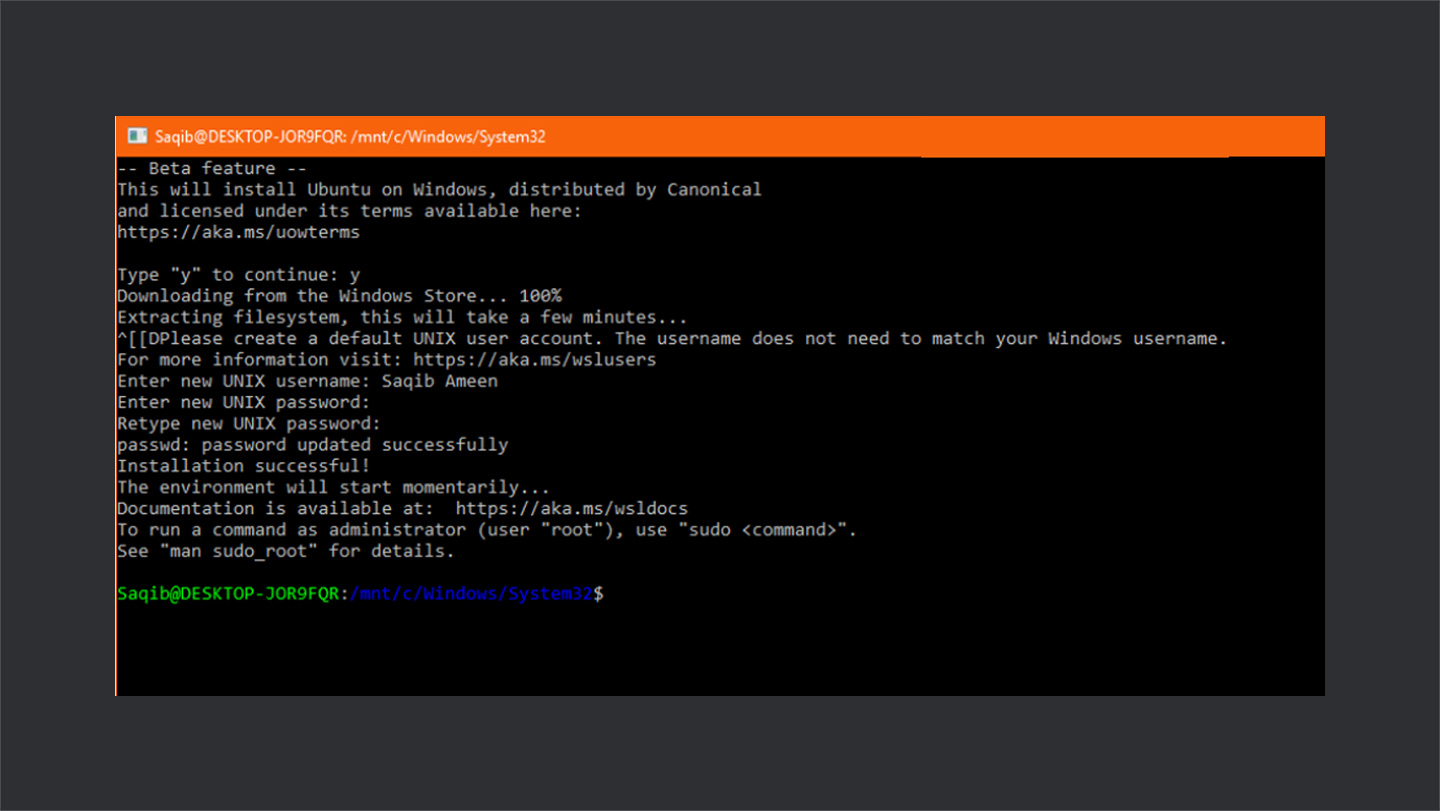
After the computer restart, go to the Start menu, and search for bash.
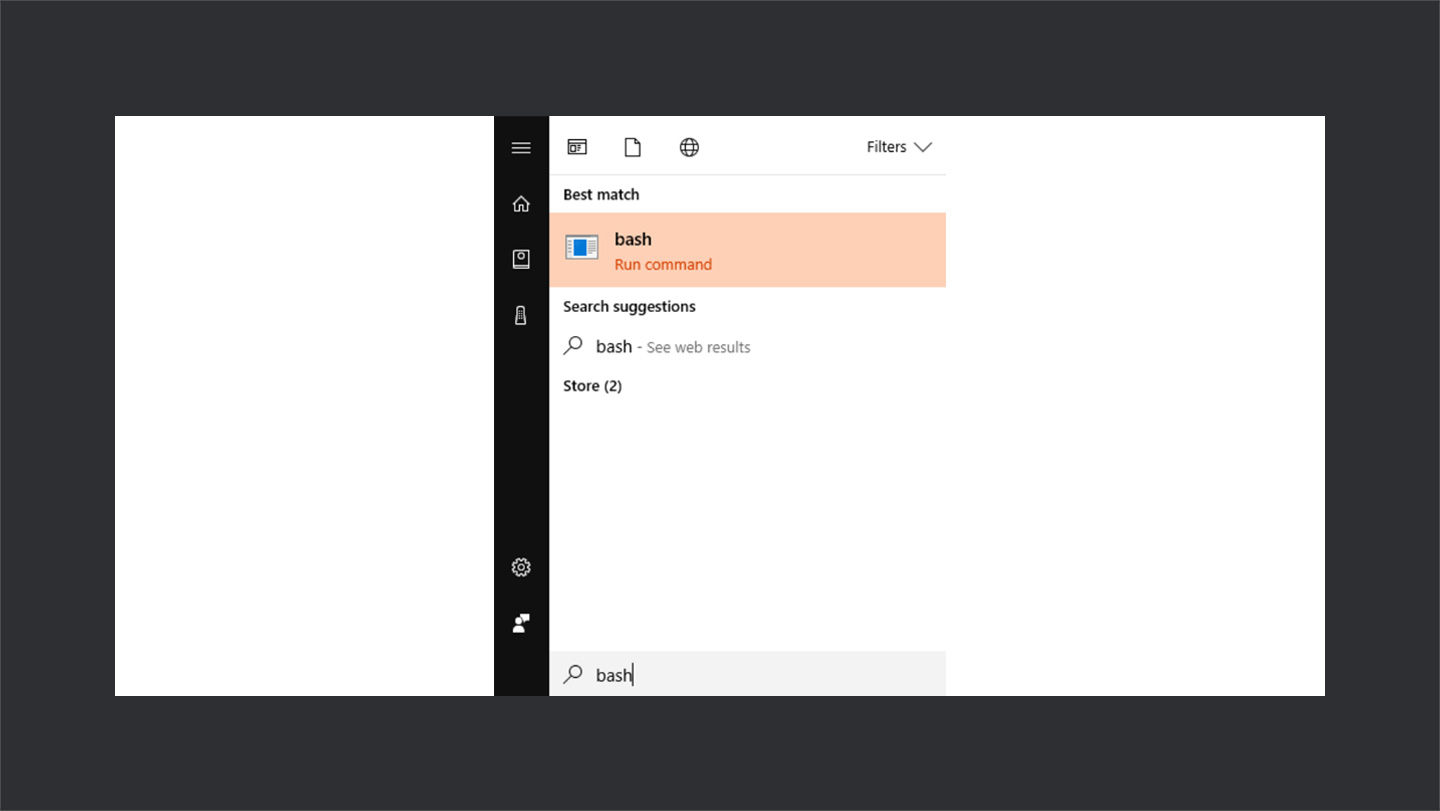

Here, it asks for your permission to install the Ubuntu system files. Type ‘y,’ and hit Enter. It will download and install files from Microsoft Windows Store. After installation, it asks for the username and password.
Enter the credentials, and bash is ready to use. Next time you need to run bash, go to start menu, type bash, and select ‘Bash on Ubuntu on Windows,’ to start.

🔥 Customization of The Bash
The default bash colors makes it difficult for users to read and are strenuous for eyes. So, in this section, you’ll learn how to customize your bash to make it look colorful and intuitive.
For this purpose, I’ll switch to Z Shell (zsh) and oh-my-zsh with the solarized color scheme.

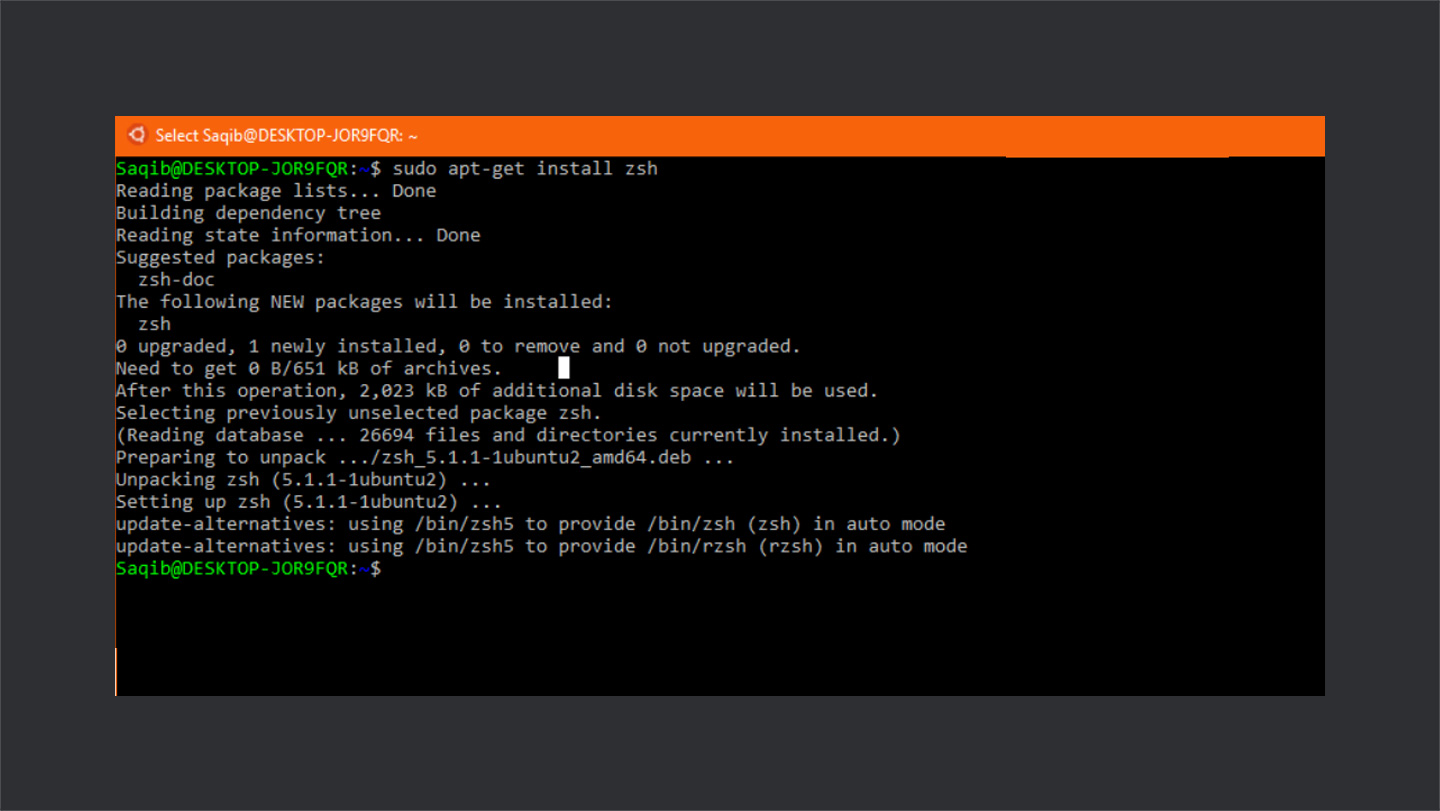
→ Step #1: Install Z Shell
The first step is to install Z Shell. There are a couple of reasons for shifting from bash to Z Shell. A few of them are auto-correct, auto-complete, and on the top oh-my-zsh. To install Z Shell, open bash, and type the following command:
Just type zsh in the bash to start using it.

→ Set Z Shell (zsh) As Default Shell
The next step is to make zsh as your default shell, for which you’ll not type zsh every time to open it. Type nano .bashrc to open up the configuration file. Add the following lines to make sure that every time you open up bash, it launches zsh only.
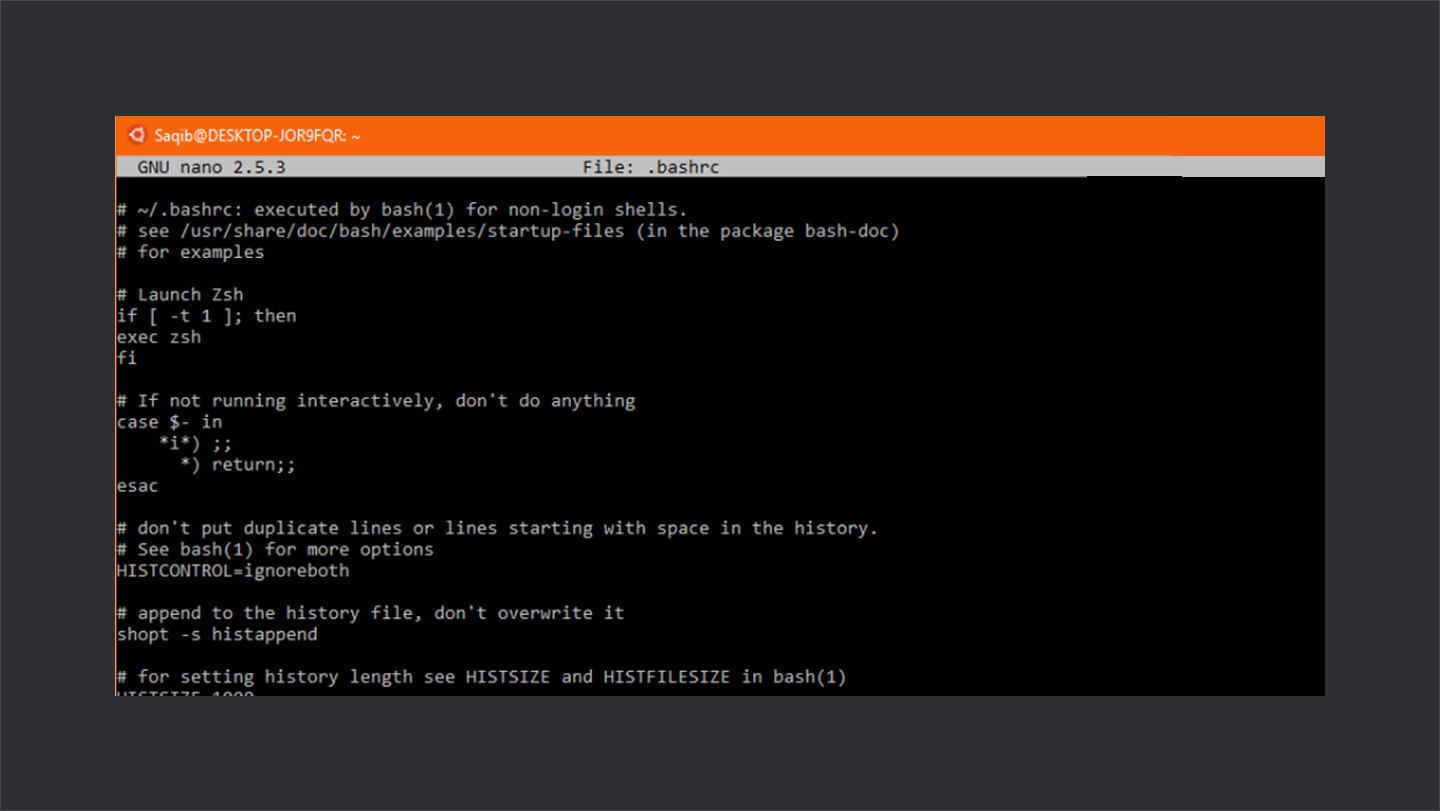
Press Ctrl+O, and then hit Enter to write the changes. Press Ctrl+X to go back. Now, every time you open bash, it will open zsh, instead of default the bash.

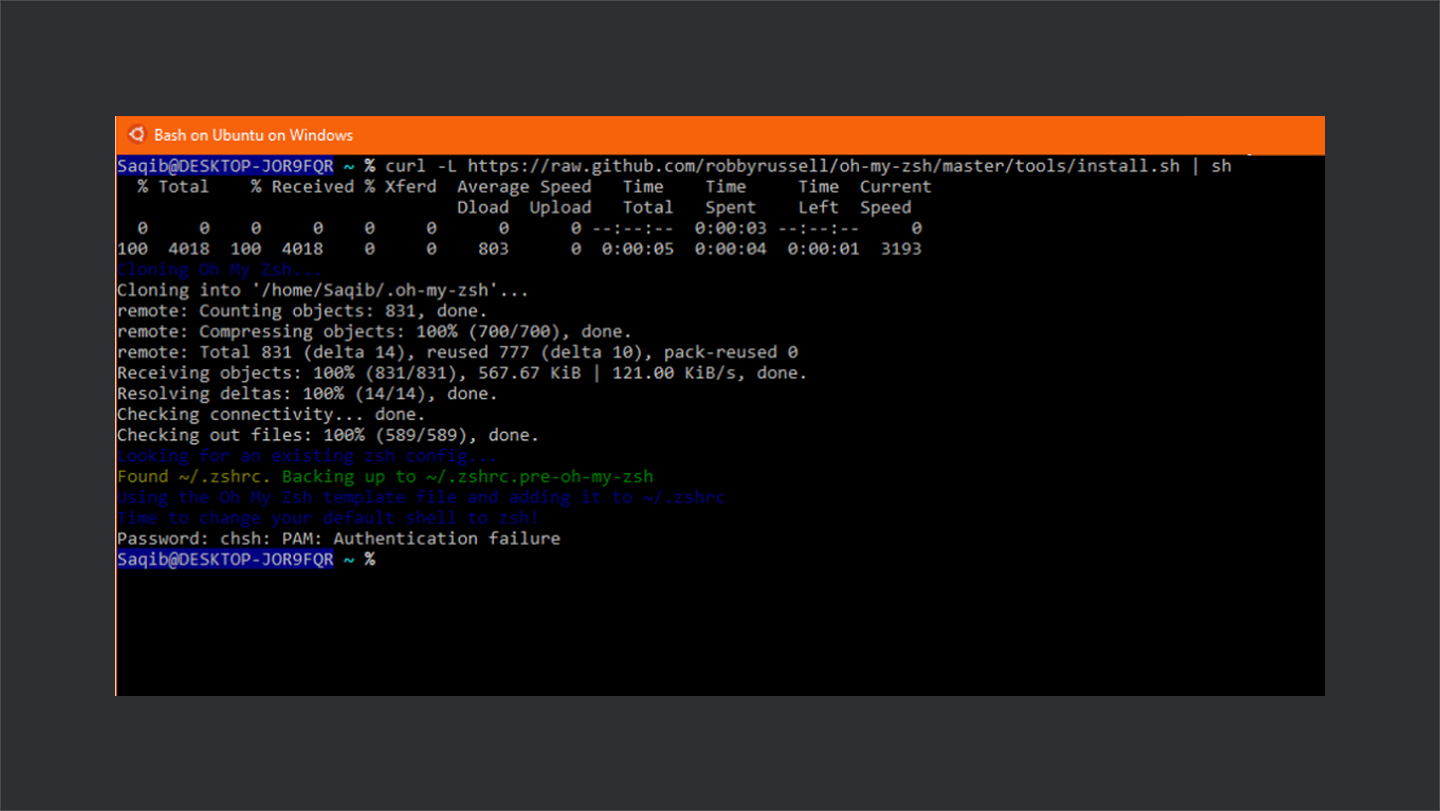
→ Step #2: Install oh-my-zsh
It’s a community-driven framework for managing the configuration of zsh and comes with a great bunch of plugins, and themes. To install oh-my-zsh, open up zsh, and type the following command:
It will install oh-my-zsh for zsh.
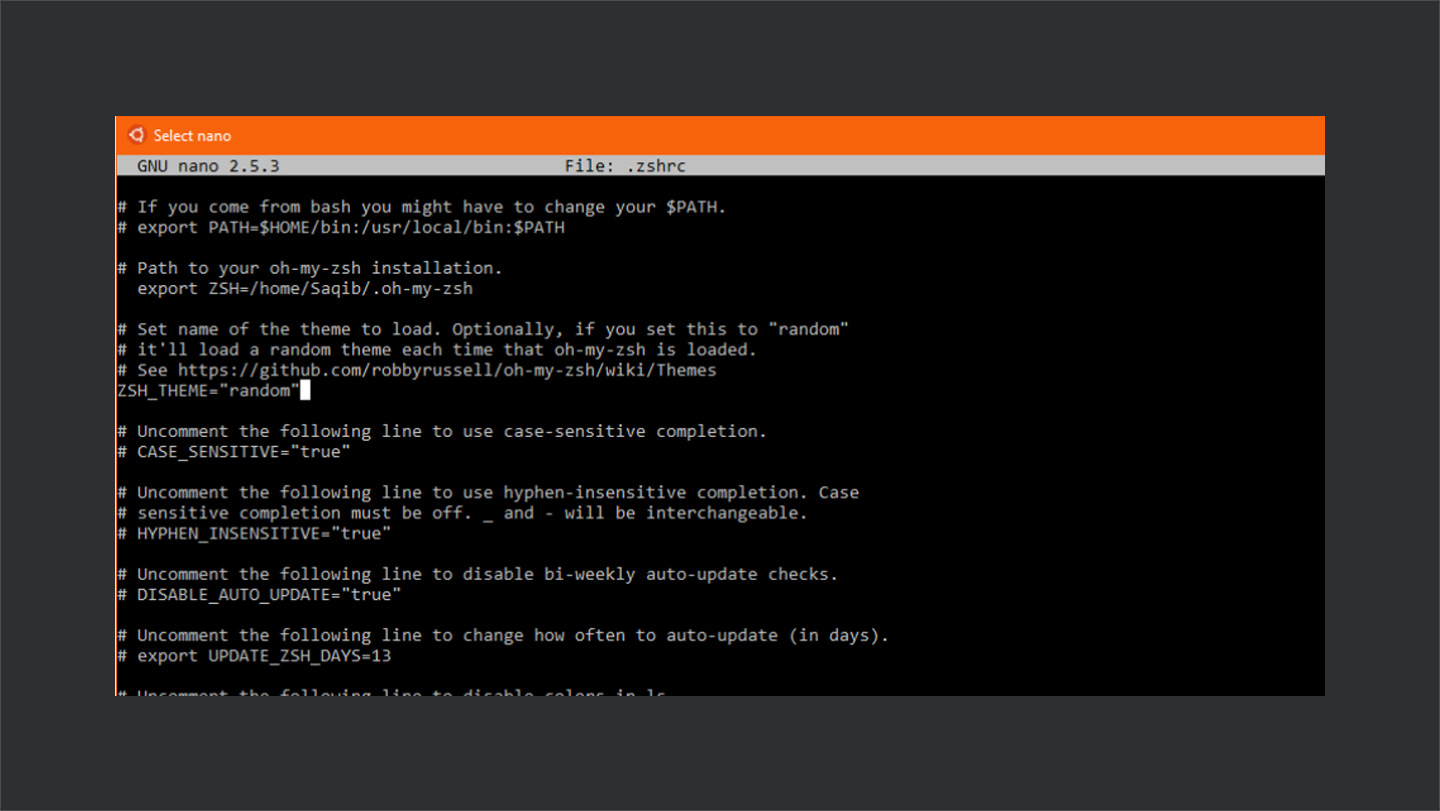
→ Step #3: Change The Theme:
Oh-my-zsh comes with a plenty of themes. You can see the list here. I’ll be using “Agnoster” with the solarized dark color scheme, and DejaVuSansMono font. To change the theme, type following command.
Find the following line:
Change ‘robbyrussell’ to ‘agnoster’ and press Ctrl+O to write, and Ctrl+X to return. Your theme will be changed.
There’s another way which allows you to change themes without writing its name explicitly every time. To do so, write random instead of theme name in the .zshrc file, i.e.:

Now run the following command a couple of times until you find the theme that you like:
Next, use the following command to get the name:
After getting the name, edit the .zshrc file and add that name manually.
→ Install Fonts
The chances are that after getting a theme, you might find a few symbols are missing. This is because you don’t have powerline fonts installed on your windows. Download, and install themes from this repository.
After installation, go to the properties of the bash and select the font which you like. I am using DejaVuSansMono font that you can get here.
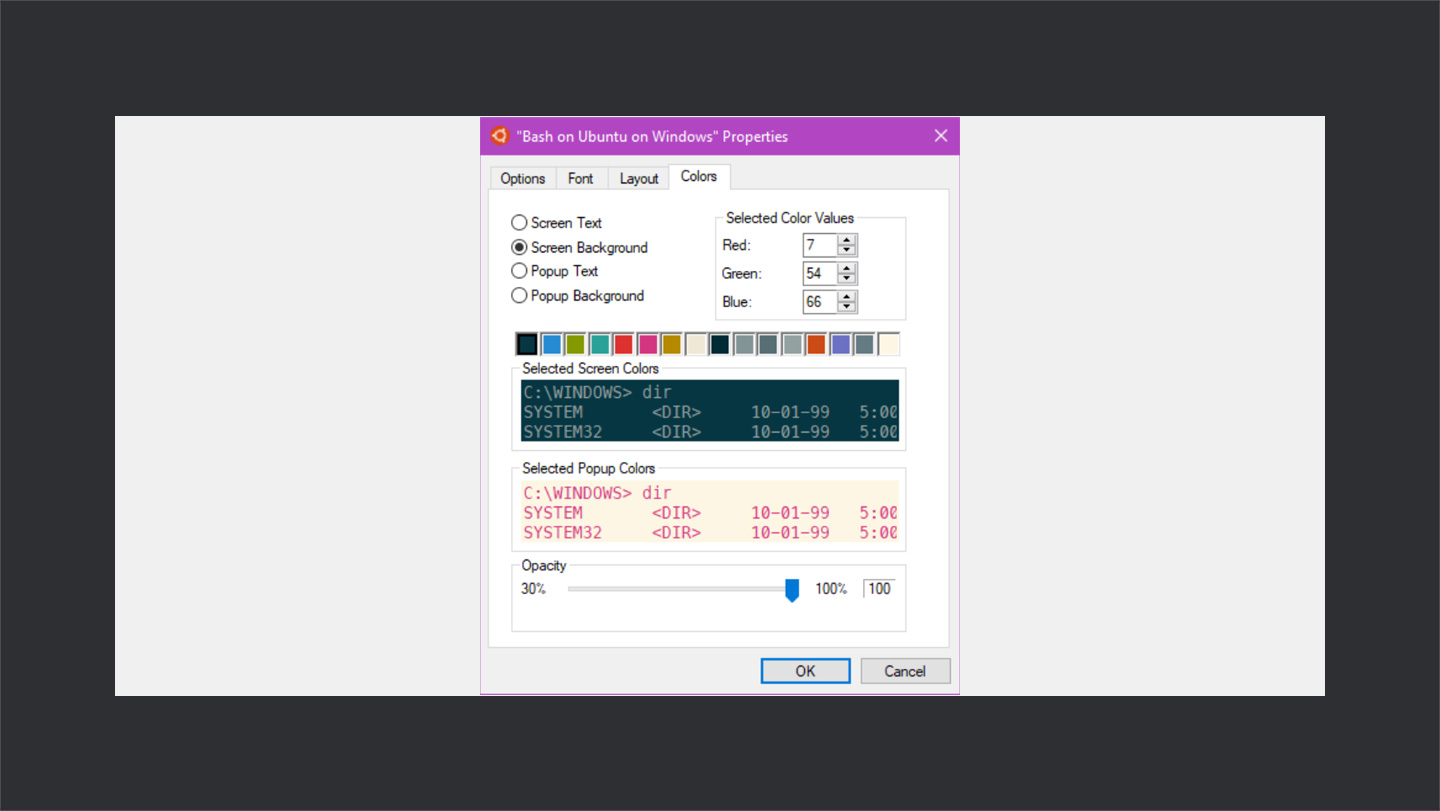
→ Step #4 Change Color Scheme of Bash
Now, the only thing that is missing is the color scheme. Go to the Properties of bash, and change the colors according to the following table. Thanks to this guy who created a thread on Reddit for formatting the table. The RGB values can be found here.
| Color # | Solarized colors |
| 0 | base02 |
| 1 | blue |
| 2 | green |
| 3 | cyan |
| 4 | red |
| 5 | magenta |
| 6 | yellow |
| 7 | base2 |
| 8 | base03 |
| 9 | base0 |
| 10 | base01 |
| 11 | base1 |
| 12 | orange |
| 13 | violet |
| 14 | base00 |
| 15 | base3 |
Finally, your colors tab should look like this:

And your bash should be like this:
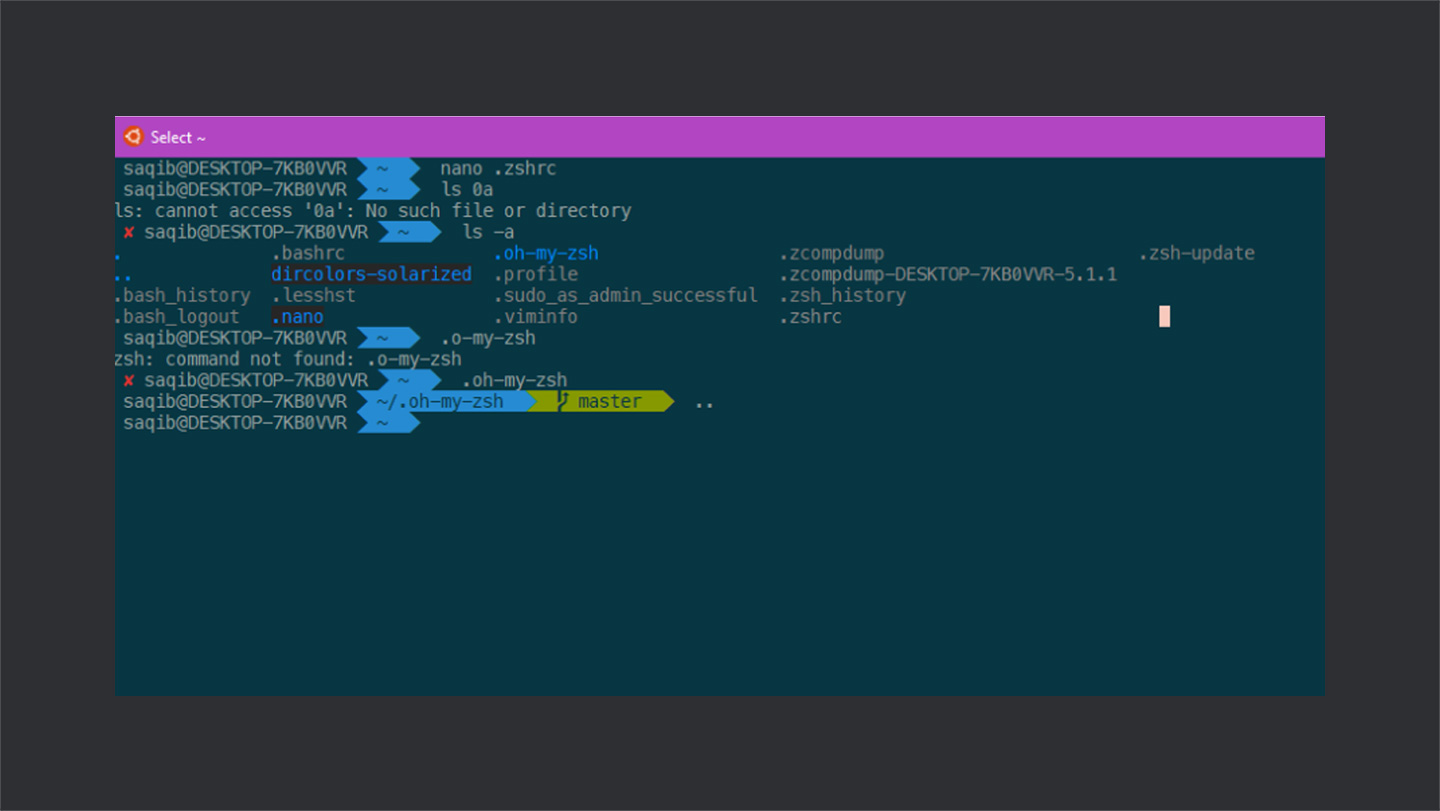
Pretty awesome, right?

🙌 Wrap Up
So, that’s all about it. There’s still a lot that you can do with bash. It all depends on your choice and needs. It was a beginner-focused article to help you set up bash in Windows and start customizing it.
If you have any questions, tips, or thou feel free to share in the comment box below.
TheDevCouple

AHMAD AWAIS
Developer edutainer: NodeCLI.com · VSCode.pro
Ahmad Awais is an award-winning open-source engineer, Head of Developer Relations at RapidAPI, Google Developers Expert Dev Advocate, Node.js Community Committee Outreach Lead, WordPress Core Dev, and ex VP of Engineering at WGA. He has authored various open-source software tools used by millions of developers worldwide, like his Shades of Purple code-theme or projects like the corona-cli.
Say Hi to him on Twitter — @MrAhmadAwais.

MAEDAH BATOOL
Developer Content Manager: Writy.io
Maedah Batool is an official WordPress Marketing Team Representative, a WordPress Core Contributor, Technical Content Manager and Director of Developer Content at WGA. She created a tech-training startup called FinkTanks where she has taught 7,500+ girls how to code with WordPress, Next.js, React, and more. After FinkTanks was acquired she took a role in DevRel as a Technical Content Manager.
Say Hi to her on Twitter — @MaedahBatool.
🙌
SUBSCRIBE TO DEVELOPERS TAKEAWAY!
A Premium Development Newsletter by TheDevCouple! What is TheDevTakeaway?

Meet Ameer Dagha the man behind ReviewsPK
Read Article
Ebad Ali – Auto Industry Expert Talks About the Success of Kia and Lucky Motor Corporation
Read Article
Great guide! Thank you!
Hey, Alex! — thanks for dropping by. Been looking at you in the stargazers of several of our projects and now this blog. It seems so you like what we do 🙂 👊
Hey, I have a problem following your guide, when you ask to type in certain commands, I cannot see them. Is it possible something has gone wrong?, thank you.